Sideways Storage in the Classroom
Classrooms can get cluttered without a doubt.
Smart teachers save everything. You never know when you might need that stack of newspaper sale ads for a budgeting lesson. Or a class set of mini magnifying glasses when you find a cool bug in the room. Or even all those millions of google eyes when you decide to make a fun writing prompt that involves an imaginary monster with 5 eyes.
But most teachers do not have unlimited space in which to store everything.
So we need to be strategic about how everything is put away – as well as how to find it again when we need it.
There’s nothing worse than finding the perfect resource material 2 weeks after you have taught the lesson.
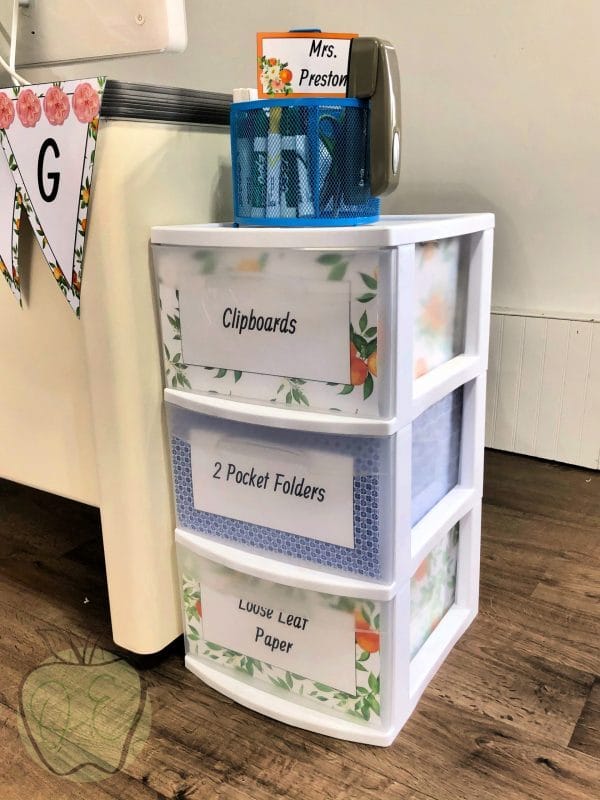
One handy trick I like is using inexpensive plastic storage towers.
Depending on where they are located and what is in them, they can even usually be stacked.
They are wonderful for not only housing overflow materials, but even for making a specific “centers” area in the classroom when space is at a premium.
You can place one of these towers on top of a table, on the top of wall cabinets or wardrobes, or even on the floor under a table and label them as the center name where they will find all the materials inside needed to complete the activity.
Keep reading below for a list of possible ways to organize your storage towers.
Making Your Storage Look Spectacular
If you have been a reader here at Organized Classroom, you know that I am a big fan of everything have a place in the room.
Having an organized system that stays in place all year is the key to feeling prepared and less-stressed throughout the school year.
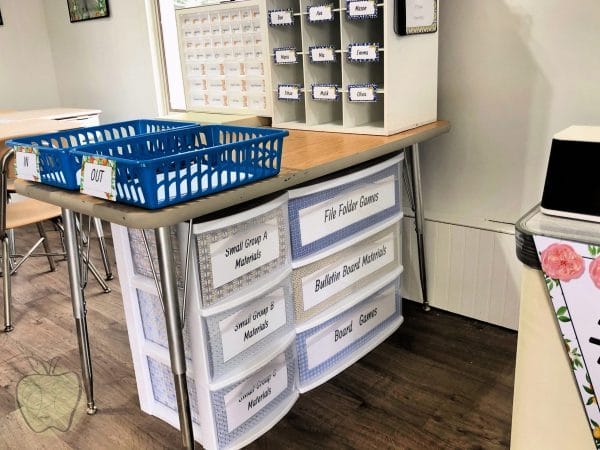
So when I set up my storage towers, I take a look at them from all angles in the room.
I don’t look at just the front where I will obviously have a label stating what is inside of each drawer, but I also take a look at the sides and back of the tower.
If I can see all the messy materials inside, I simply add a panel that hides everything inside.
And the best part is that the panels match whatever classroom decor theme I happen to be using that year – and they are very easy to swap out from year to year.
Having everything concealed makes it easier to just toss all the materials inside the tower, usually not needing to have all the cords wound up perfectly for example, because no one will see all the items inside with the side or back panels in place.
It really is the little extras that make me smile when I notice them in my classroom throughout the day.
More Ideas for Storage Tower in the Classroom
Need some more ideas for how you can organize your storage towers? Check out some of my favorite sorting solutions below.
- centers (reading, writing, vocabulary)
- subject (math, social studies, science)
- classes or periods (Period A, B, C)
- grade levels (5th, 6th, 7th)
- technology tower (headphones, tablets, power cables)
- writing products (loose leaf, spiral notebooks, composition books)
- textbooks (math, reading/LA, science)
- extra school supplies (pencils, crayons, painting supplies)
- paper products (tissues, paper towels, napkins)
- dry erase tower (boards, markers, erasers)
- lunch tower (lunch box storage)
- assessment tower (one drawer for work turned in, one for work that needs returned)
- classroom library (books that need resolved and books that need to be checkout out)
- classroom mgmt. shopping store (each drawer is a different “price” for rewards)
- recycling (use the drawers for extra large scrap paper and copies to be reused)
- bulletin board materials (borders, cut outs, letters)
Want some storage tower labels that match a whole classroom done-for-you theme?
Check out the Organized Educator Packs ready to print and display right away in a ton of different themes!
Click HERE to see what sets are available now.
What have you used plastic storage for in your classroom? We would love to hear your ideas in a comment below as well!
~Charity