Making Some Classroom Mailboxes!
I don’t know about your classroom supply budget, but mine never seemed to take me far after I bought teacher supply necessities like copy paper, pencils, and chart paper.
I LOVE the usefulness of student mailboxes, but paper sorter/organizers that can be used for classroom mailboxes can run around $100 for 12 slots (and that is the cheap version!) – not to mention, that won’t be enough for one class of students, so you would need 2 or 3!
That is a bit pricey!
So, I decided to see what I could come up with on my own, and this version will cost you less than $30 to make a complete set – NICE!
Homemade classroom furniture sometimes is the only way to get new much needed pieces in your room. The do it yourself ideas that might need some assembly might take more time to pull together, but you know if you ever move to a different school, that item will be coming with you.
Creative DIY Mailbox Ideas for Teachers
Repurposing Everyday Items
One popular idea is to repurpose old shoeboxes or cereal boxes to create individual mailboxes for each student. These can be decorated and labeled with each student’s name, adding a personal touch to the classroom.
Using Alternative Containers
Another creative idea is to use hanging file organizers as classroom mailboxes. These can be easily mounted on a wall or placed on a shelf, providing a convenient and organized space for students to submit and receive materials. Additionally, teachers can use small plastic storage containers or bins as individual mailboxes, which can be stacked or arranged in a way that best fits the classroom layout.
Custom-Designed Mailboxes
These DIY mailbox ideas not only save money, but also allow for customization and personalization that traditional mailboxes lack. Another creative DIY mailbox idea for teachers is to use repurposed materials such as cardboard, wood, or even PVC pipes to create custom-designed mailboxes. For example, teachers can create a mailbox system using PVC pipes that are cut into individual sections and labeled with each student’s name. This not only adds a unique touch to the classroom, but also provides a durable and long-lasting solution for managing student communication.
Adding a Personal Touch
These creative DIY mailbox ideas not only make the classroom more organized, but also add a touch of personality and creativity to the space. Teachers can get creative with their mailbox designs by incorporating themes or colors that match the overall classroom decor. For example, a teacher with a nautical-themed classroom could create mailboxes using wooden crates or barrels, adding a fun and cohesive element to the classroom environment.
Organizational Tips for Managing Classroom Mailboxes
Once the classroom mailboxes are set up, it’s important for teachers to establish an organizational system to manage the flow of communication effectively. One organizational tip is to create a clear labeling system for each mailbox, whether it’s using student names, class periods, or subject areas. This makes it easy for students to find their designated mailbox and for teachers to sort and distribute materials efficiently.
Additionally, teachers can implement a color-coding system for different types of materials, such as assignments, handouts, or parent communication. This helps both students and teachers quickly identify the purpose of each item in the mailbox. Another organizational tip for managing classroom mailboxes is to establish a routine for checking and distributing materials.
Teachers can set specific times during the day when students are allowed to access their mailboxes, such as at the beginning or end of class. This helps prevent disruptions during instructional time and ensures that students have regular opportunities to receive important information. Additionally, teachers should establish a system for collecting and organizing materials that have been submitted by students.
This could include using separate bins or folders for assignments that need to be graded, materials that need to be returned to students, and items that need to be filed or stored for future reference.
Personalizing and Decorating Your Classroom Mailboxes
One of the benefits of DIY mailbox hacks is the ability to personalize and decorate the mailboxes to fit the overall theme and aesthetic of the classroom. Personalizing the mailboxes not only adds a fun and unique touch to the space, but also helps students feel more connected to their designated mailbox. One way to personalize classroom mailboxes is by adding student names or initials to each mailbox using vinyl lettering or adhesive labels.
This not only helps students easily identify their mailbox, but also adds a personalized touch that makes them feel special. Another way to personalize and decorate classroom mailboxes is by incorporating themes or colors that match the overall decor of the classroom. For example, if a teacher has a jungle-themed classroom, they could decorate the mailboxes with animal print contact paper or add jungle-themed stickers or cutouts.
This not only adds visual interest to the space, but also creates a cohesive look that ties into the overall classroom theme. Additionally, teachers can encourage students to get involved in decorating their own mailboxes by providing materials such as stickers, washi tape, or markers that they can use to personalize their space. This not only fosters creativity and ownership among students, but also adds a personal touch to the classroom environment.
Streamlining Communication with Students and Parents
Streamlining Communication with Students
One effective way to utilize classroom mailboxes is to use them as a central location for distributing important information to students. This can include class schedules, upcoming events, or reminders. By doing so, teachers can ensure that all students have access to the same information, thereby preventing miscommunication or missed deadlines.
Streamlining Communication with Parents
Classroom mailboxes can also be used to send important documents or updates to parents. Teachers can distribute newsletters, permission slips, progress reports, or other vital information that parents need to be aware of. This provides a convenient and consistent method of communication, keeping parents informed about classroom activities.
Enhancing Overall Communication
By leveraging classroom mailboxes as a communication tool, teachers can create a more organized and efficient system for sharing information with both students and parents. This, in turn, can lead to improved relationships, increased engagement, and a more productive learning environment.
Things to consider when choosing your classroom paper sorter:
- You will want to think about what type of materials the paper slots will be holding. You will need an entirely different type of building material if you are holding textbooks as opposed to just a few pieces of paper daily. It might mean the difference between a wooden, plastic, or cardboard center.
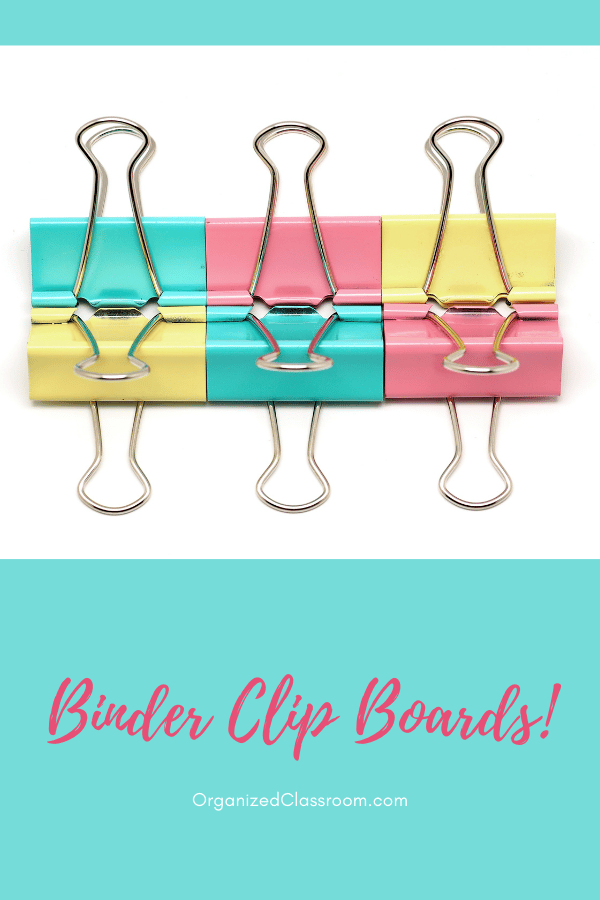
- Make sure there is someplace to add individual name tabs. Students will need to be able to distinguish which cubby is theirs. Need an idea for an easy way to create cubby clips? See THIS POST.
- Where the classroom keeper will be located. If you don’t have much in the way of extra counter space, you might want to consider going with a hanging wall file. That way you are able to utilize vertical storage instead.
Instructions for How to Make Your DIY Classroom Mailboxes
First, you will need to preorder some shipping boxes from the United States Postal Service. Look for the free ones, that are wider than a standard size sheet of paper.
*NOTE – honest mistake (I really didn’t know this), but apparently if you order them, they are legally to be used for mailing as they are intended.
BUT, you could reuse boxes that have already been mailed to you as an effort to reuse.
OR you could use cereal boxes that are reinforced with packing cardboard from other boxes you might have as well.
If you have a long window counter with space, you can even make them with vertical cereal boxes that create a 1 by however many students you have array that won’t need a lot of strength for stacking on top of one another.
I love when there are multiple choices which match your needs and wants.
The ones I made in my demo are smaller boxes because that is what I had on hand already. These could make for a cute teacher mailbox desk organizer as well.
You might want to check out:
Need some new ideas for classroom decor and instructional materials in the classroom you can make yourself? This 219 page digital book has you covered!
Includes 25 articles from Organized Classroom, including topics such as:
- Simple Chair Pockets
- DIY Classroom Mailboxes
- Cute Student Birthday Snacks
- Page Protector Solutions
- Easy Center Sign Holders
- Pocket Chart Makeovers
…and even more!
Now available in our Shop! And the second copy to share with a friend is half price!
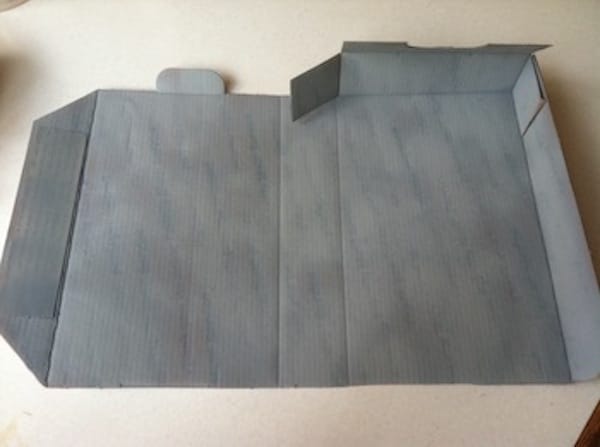
Once you are ready to begin your project, you need to decide what you want the inside of your mailboxes to look like, whether you prefer the cardboard look, or want a specific color.
I spray painted each of my boxes a matte gray color on the inside with one coat of quick dry spray paint.
If you do 2 coats, you would have a much nicer coat – or you could even roller on paint (I wonder how dry erase paint would work so you could then write the student names inside of each of the mailboxes?).
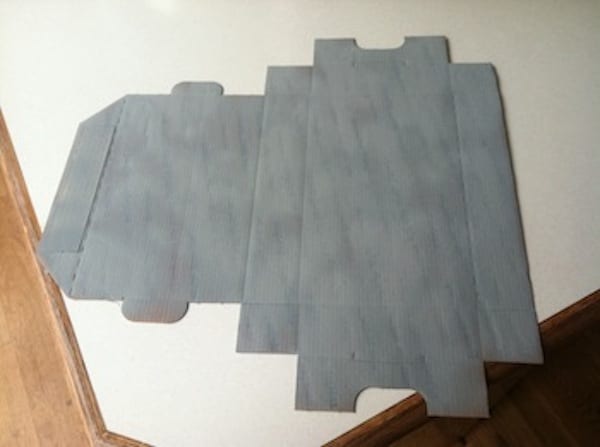
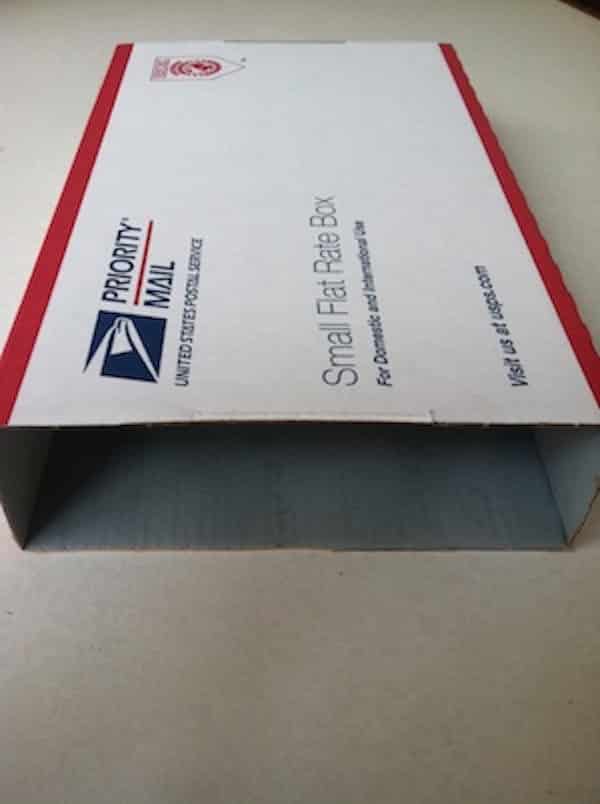
After the paint has dried, cut off the tabs on the one end, and assemble the box, reinforcing with clear packing tape around the joints.
Do the same for all boxes in your set.
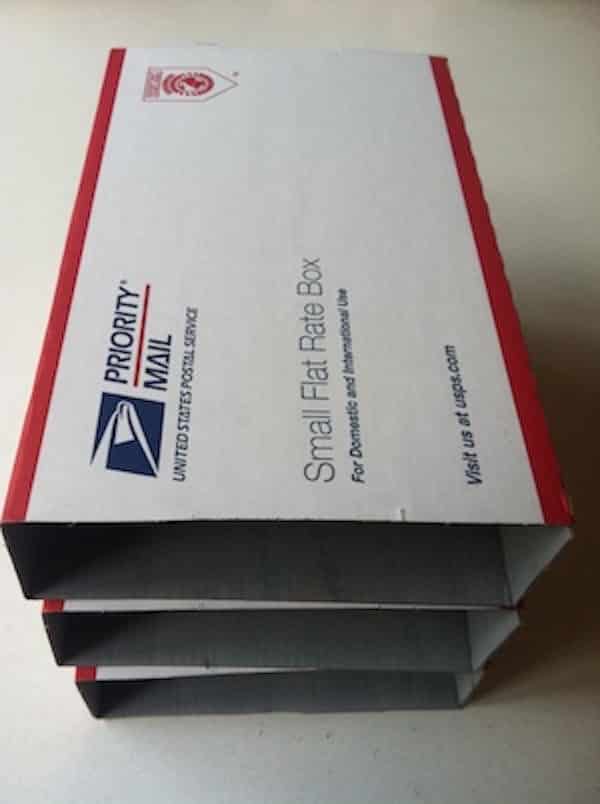
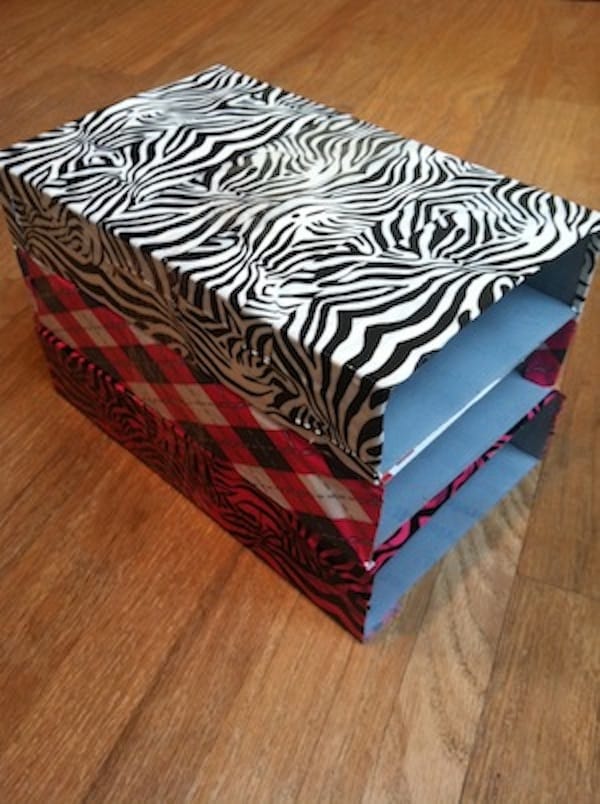
Next, place the boxes in even rows flat on the table and use clear packing tape to connect the boxes across in the row (not shown).
Now, you should be able to place (without taping) the rows on top of one another to see what the mailboxes will look like after decorating.
Decide what colors you will be using on which rows.
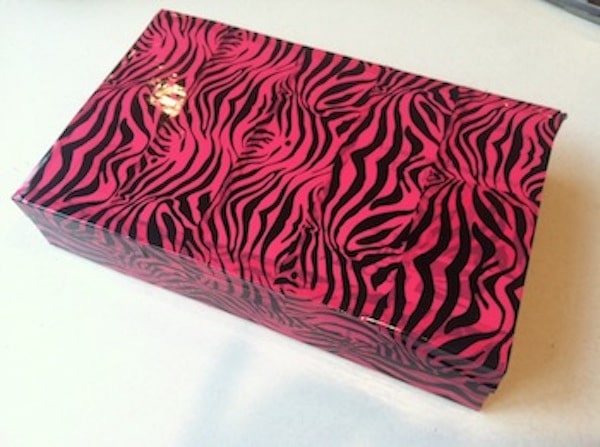
I used decorative packing tape on some of the boxes, and decorative duct tape on some others, which I bought at my local Walmart in the packing tape aisle and the hardware aisle. Both work equally well.
Keep in mind that there is writing on the outside of the boxes, so if you are planning on using a light colored design, you might want to either spray paint the boxes white before decorating, or use the thicker duct tape.
Of course, you could use stickers, decoupage, fabric, or paint designs on the boxes instead. I like the tape because it was easy, non-messy, tons of designs and colors to choose from, and looked pretty cute (if I do say so myself).
Remember when you are purchasing supplies that you will only need to decorate the parts of the rows that are showing.
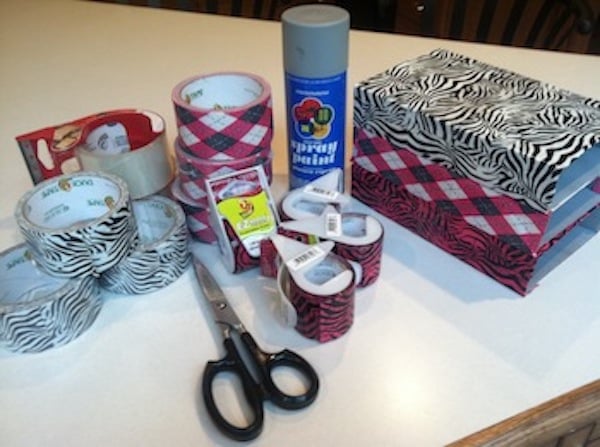
Don’t go way out of your way to decorate those inside faces as they are not seen anyway.
Last, after you have your rows decorated to your heart’s content, use the clear packing tape to connect the rows on top of one another to complete the project.
The last step would be to make some labels with student names on them and place on the inside of the box so they know where their materials are located.
Of course, these mailboxes will not hold books or other heavy materials, but for basic use throughout the year for returned papers or handouts from the office or even for a drying rack for art projects, they will be perfect for the price!
And you can match your classroom theme!
Maintenance and Upkeep of Classroom Mailboxes
Once the classroom mailbox system is in place, it’s important for teachers to establish a routine for maintaining and organizing the mailboxes on a regular basis. One maintenance tip is to set aside time each week for cleaning out and organizing the mailboxes. This could include removing any outdated or unnecessary materials, sorting items into designated bins or folders, and ensuring that each mailbox is labeled correctly.
Another maintenance tip for classroom mailboxes is to establish a system for addressing any issues or repairs that may arise. For example, if a mailbox becomes damaged or worn over time, teachers should have a plan in place for repairing or replacing it as needed. Additionally, teachers should regularly check the functionality of the mailbox system as a whole, ensuring that it continues to meet the needs of both students and teachers.
Implementing a DIY mailbox system in the classroom can be an effective way for teachers to streamline communication with students and parents while also adding a personalized touch to the learning environment.
By utilizing creative DIY ideas, establishing an organizational system, implementing budget-friendly hacks, personalizing and decorating the mailboxes, streamlining communication, and maintaining the system on an ongoing basis, teachers can create an efficient and effective method of managing student communication in the classroom.
With these tips and strategies in mind, teachers can create a functional and personalized mailbox system that enhances communication and organization in their classrooms.
What would you use these for in your classroom? I would love to hear it in a comment below!
Would you like to know step-by-step routines that put teachers back in control in just 4 weeks?
Download the FREE Classroom Systems Starter Kit now!
Enjoy and have fun creating!
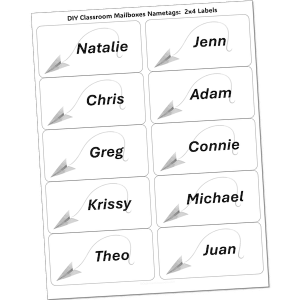
PS – Need some customizable name tags to place inside each of the new compartments for your students?
Download the file below, edit the text boxes in either Google Slides or Powerpoint, and print on either 2×4 labels or plain paper.
Attach to the inside of your boxes and display!
~Charity