Simple Lesson Assessment
Today I have a question from Jillian. Jillian writes and asks, “How do I know if students really understood the lesson after I’ve taught it? They seemed liked they know they do. I walked around and saw that they were doing the work fine. Sometimes I even have them in groups and it appears as though they are doing great, but then I assess them and they all completely bomb it. I didn’t even get the glazed eye look.”
Jillian that’s a great question, and I know many of us had a lot of lessons that we have taught in the past where exactly the same thing happened. We thought they understood it, we thought, “Wow, that was a killer lesson. I should be teacher of the year for that lesson. And then they assess on it and they did terrible, right?”
Here is a fun idea for you to try and it’s a completely informal assessment, but it kind of gives you some bearing on how the lesson went for the day. It is a basic printable hand out, and I will have this below, where you can grab this freebie and just print it off to your hearts content.
You might want to check out:
Need some new ideas for your assessment and parent conference routine? This 82 page digital book has you covered!
Includes 14 articles from Organized Classroom, including topics such as:
- Saving Grading Time
- How to Set Up Student Data Folders
- Self-Assessment for Students
- Quick Informal Assessment Hacks
…and even more!
Now available in our Shop! And the second copy to share with a friend is half price!
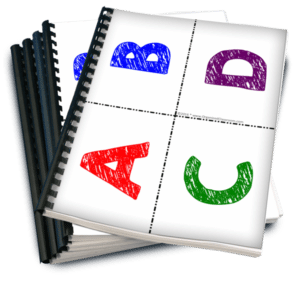
As you’ll see it has A, B, C and D and then on the other side we have some True and False and some yeses and no’s. It’s very simple to use it. Print it on white card stock, double sided. It doesn’t matter which side’s up, which side’s down, it’s all going to work the same.
If possible have the color version, if you can. That’s why I suggest doing it on hard card stock and then laminating it so you can use it from year to year and just replace the ones that need it. Or if it works all year then you make new ones next year, that’s probably even worth it just for the color ink for these few copies that you’re going to have to make. One copy per student.
It’s very simple to use. Throughout the lesson they can have this sitting in a folder, in their desk, … or if you just want to hand them out at the beginning of the lesson.
As you are going through the lesson, maybe give them a multiple choice question and say, ” What do you think that the answer to this math problem is? A, B, C, or D?”
Perhaps have some multiple choice options done ahead of time or you can write them up on the board or the smart board, transparency if you still use an overhead. The student figures out what he or she believes the answer is, they take the paper, and fold it so it is accessible to the answer they want to show.
Now let’s say they think the answer is B – the key to this is they do not hold their answer up. Otherwise you’re going to get the students that are going to look around and see what everyone else is answering.
Actually have them hide their answer, cover it up, hide it, no one else can see it. Then you’re going to say, “Everybody show your answer, 3, 2, 1 boom.”
Would you like to know step-by-step routines that put teachers back in control in just 4 weeks?
Download the FREE Classroom Systems Starter Kit now!
Everybody holds it up really high, above their head. Why above their head? That way they can’t look around and change their answers and go back through and flip it and all that. You just want a true test.
I love that it’s color coded because even if see a bunch of B’s you’re going to see the blue before you’re going to see anything else. If you have a sea of blue and then suddenly you see a handful of A’s with the red, you’re going to know who you need to target and you can simply jot down notes if you want to, or pull those kids aside very quickly and say, “You guys go work on this, you few come over here let’s look at this again real quick.”
Then you can do the same thing on the other side.
You say, “Okay, true or false, Abraham Lincoln was the first president of the United States? Okay, don’t anyone show me, everyone go ahead and get your answers ready, pull up your desk if you have too, put some little privacy folders if you need to and cover it up. Don’t let anyone else see it. Okay when I say 3, 2, 1, on 1 you’re going to hold it up very high above your head. Put it on top of your head if you want to.”
That’s always a fun thing to do as well. “Are you ready to show me? Okay, 3, 2, 1.” If they do this, then they think it’s kind of fun anyway and they may still look around. Try to get them, look forward, don’t look behind you, don’t look around you – all that good stuff.
You can also do some quick get to know you activities throughout the day.
Use the yeses and the no’s for simple things. “Who did their homework today?” “Who ate breakfast today?” “What time did you go to bed last night? A, B, C or D.” Anything that has a true and false.
It’s very, very quick, it’s very simple, and it keeps them all engaged. Everyone has to answer so you have a 100% response from everyone in your classroom at the same time so you can kind of get a pretty good feel for whether they understood the lesson or not.
Jillian I hope that was a fun answer to your question.
Again if anyone wants this handout, feel free to print it off from the download link below.
I would love to see all your response cards, even better in if you’re able to snap a picture or video of them in action. Feel free to post it on our Facebook fan page, and as always we love comments right here on the blog too.
If you feel this was helpful, please don’t keep us a secret. Share it with your other teacher friends and on social media if you feel it can help someone else too. Have a great week everyone and I will talk to you soon,
~Charity