10 Tips for Organizing Your Technology Center
I am super excited to be here today to share some ideas for you on how to organize your technology center.
I started this post to be specifically geared to a computer center and then realized that it also pertains to iPads, MP3 players, E-Readers and various other forms of technology that might show up in your centers.
My personal classroom has 3 computer stations and an iPad station, which get mixed and matched depending on the needs of myself and my students.


Would you like premade posters to inspire your students?
This pack of 25 colorful watercolor posters includes quotes from famous athletes.
Click HERE to grab them and save yourself time!
Technology can be a vital addition to a classroom at any grade. As a former computer lab teacher, I am constantly thinking of new and interesting ways to integrate my computers and iPad into my day.
However, I have learned first hand that if I have not organized this technology well, it will become wasted instructional time.
For many teachers, this wasted instructional time leads them to give up on the technology which might have served them well.
So, today I am here to give you some simple organizational tips, which will help technology to be an effective addition to your learning centers, rather than a frustration.
1. Organize your space and make sure students have everything they need in the exact proximity of the technology they are going to use.
This includes accessories like head phones or microphones, but it also includes directions, worksheets etc.
It is a good idea to place a printed copy of directions in the location where technology is going to be used, perhaps in a page protector attached to the bulletin board, or on index cards on a ring.
For younger students, print screen shots to help guide them through multiple steps and/or sites with log-ins. Older students can and should manage a list of steps with specific websites, username and password directions.
Consider using a website management system like ikeepbookmarks or sqworl to make accessing websites easier for you and your students.
2. Before sending students to technology, have a purpose in mind. Identify specifically what skills you would like students to work on and express that purpose to them before they get to the technology. This will help your students, see technology as a teaching too, rather than just a very expensive toy.
3. Try out the technology ahead of time. Know exactly what website, program, or app you want your students to work on. Be sure you have played with this technology and are aware of places where students have to enter information, navigate to different screens, etc.
By playing with the technology ahead of time, you will know exactly what students are supposed to click on, and where problems may occur. This will help you to be ready for their questions, and even allow you to warn students about places you think they might stumble.
4. Explain and model expectations clearly ahead of time.
If available, use a projector to model for students exactly where they are supposed to click, enter information, etc.
Be sure they know ahead of time what you expect them to do while they are utilizing the technology. Students will also need to know when their turn is to be utilizing the technology. Very few of us actually have one computer per student, so we need to be sure students know when their turn is and how long they should expect to have.
Rotations are not the only way to organize time on the computer. Think outside the box – what are some other ways to organize the process of students getting on to and off of technology?
In the past, I have used Priority Lists, which give certain students or certain activities a higher priority when it comes to time spent on technology.
I have also set up specific time slots that overlapped with other activities, in an effort to be sure each student got their screen time.
Use whatever management system fits best into your overall classroom routines, but be sure that your students know and understand what is expected of them before they ever get to touch the technology.
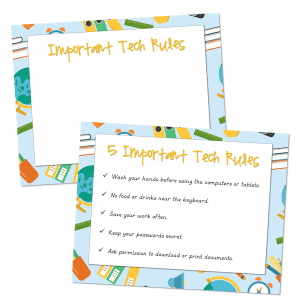
Need a quick and easy Tech Rules Poster? This pack of 2 includes one premade and another that is blank for you to edit in either Powerpoint or Google Drive.
5. Hold students accountable for their time on the computer. Students are more likely to stay on task during their technology time if they know they are going to be held accountable for their actions.
This can be as simple or as complex as youíd like. There are many paper-free options for this, including leaving a comment to a blog post or edmodo, leave a sticky note onto a wallwisher page, or add to an editable Google document.
If you would rather students have a paper to work on, you could easily use a graphic organizer, a checklist, or an internet scavenger hunt. (Click on each possibility for a free version you can download from Google Docs.)
6. Assign technology tutors. In all classes, some students are stronger in technology than others. Give your strong technology students a chance to be a helper by making them technology tutors.
Be sure that other students know who and when that they can ask for help. This should be a part of the expectations that are taught before students get to their technology center.
7. Think about saving. Before students begin working on projects that requires saving, be sure you know where they are going to save, and be sure that they know where and how to save their work. There are many possibilities, flash drives, networks, cloud networks like Google Docs.
8. Start small and work gradually, allowing students to get used to a website or program before switching to a new technology.
Choose websites and/or projects that will allow students to get used to utilizing the technology and start with these.
Then, as students build confidence in the assigned technology or program, they can move on to more complex assignments. By the end of the year, they’ll be amazing themselves (and you) with all that they can do.
9. Expect students to make mistakes, plan for it, and allow time for it. Some students will take longer to complete activities, especially as they build confidence with a given technology.
However, on the opposite end, some students will finish early. Always have an additional website or activity for early finishers Jigzone is also a great possibility.
10. Have a non-technology back up plan. Itís going to happen, the internet will go out, the electricity will go down, a computer will stop working.
Always have a back up plan, even if itís just silent reading, so that the kids donít have to interrupt your teaching if this happens. If technology dies, they should always know what to do next.
I hope some of these tips can help make your technology center run smoothly. If you’d like some specific website suggestions for your technology center, I’ve written an e-book, Websites for the Elementary Classroom, full of possibilities that you can download in a variety of formats for free.
Heidi Raki teaches at an International School in Casablanca, Morocco. In addition to being a teacher, she is also a mother of 3 young boys and the author of the blog Rakiís Rad Resources. She believes in using quality teaching strategies and quality resources to create quality teaching moments that will resonate with her children, increasing understanding and a love of the learning experience. Feel free visit her blog at www.rakisradresources.com.