Teacher Desk Organization
I had a request for a video from one of our awesome Facebook Fans last week, and I wanted to make sure I got to it for her – Teacher Desk Organization! In the video below, I explain how I manage to keep my desk clutter-free (because we know I can’t stand for there to be piles.)
It is a system I use to keep everything in one place and not in a pile to be dealt with later. I think the key is probably to handle each paper only once and either toss it, or file it accordingly. You’ll see a couple of other tips in the video.
Would you prefer to read the transcription of the video instead of watching?
Read below for the transcript:
“I had a question posted to me on the Facebook fan page of The Organized Classroom Blog from a reader who wanted some tips on how to keep the teacher’s desk organized.
And that’s a pretty big one.
I definitely know plenty of teachers that have gotten into their room and there’s a pile after pile after pile after pile. For some teachers, that works great.
I actually student taught under a fantastic mentor teacher who was a pile maker. She had piles everywhere, but she knew exactly what was in each one of those piles. And so there was a method to her madness.
So if that method works for you, great.
If it’s not working for you, well hopefully I can give you a few tips today.
You might want to check out:
Need some new ideas for organizing your classroom environment? This 108 page digital book has you covered!
Includes 16 ad-free articles from Organized Classroom, including topics such as:
- Easy DIY Projects for Making Mundane Office Supplies Cute Again
- New Ways to Use Old Supplies
- A Quick Tech Tutorial that Will Save You Money on Classroom Decor
- Unique Ways to Use Binder Rings
- Student Desk Straightening Tips
…and even more!
Now available in our Shop! And the second copy to share with a friend is half price!
First of all, everything is clear on my desk and then I begin by grabbing a plain empty mug. Any kind of mug will do.
Inside the mug I place all my writing utensils, pencils, pens, and scissors because I’m going to need those regularly.
Sometimes I’ll even put a stapler in there as well and then that mug sits on my desk.
I place rubber bands and paperclips and things that tend to get really messy and kind of lay all over the place into my desk drawer in a small box. They don’t always make it in the right spot, so they go to my desk drawers where no one can see.
That’s the key there. The top of my desk always stays clean.
Don’t look at my drawers – haha! I can always organize those as as needed but they are hidden from sight. If you appear unorganized to parents and administrators and students, then that does not put a good image on you. So make sure your desk area is pretty clear.
Now, the next thing I do is whenever I am doing my lesson plans, I make sure that I have my lesson plans sitting someplace else in the room, even if it’s behind my desk on top of a filing cabinet on top of a student desk.
I organize my materials for my lessons in a large file crate. Ask anybody, and I bet you’ll see these crates everywhere in my room. I make a file for each day of the week: Monday, Tuesday, Wednesday, Thursday, Friday.
On Friday before I leave, I prepare all the materials at least for Monday and Tuesday and I put everything inside of the labeled daily file folders {all the copies and manipulatives needed}, put them right inside the files.
If I have big manipulatives that I’m going to need to get out, I set those right to the side of it as well. Then I put the whole crate on a student desk that’s against the wall Right in front of the crate I will set my lesson plan book opened to the next day’s lessons.
So that way if I’m not there and something comes up over the weekend, or I get sick, or one of my kids get sick, I can send a substitute in there and my plans and materials are ready to go. I’ve had lots of compliments from my substitutes about how organized that is because they don’t have to search for anything.
It’s already there.
Another thing I have on my desk is one of those big huge desk calendars where I would write reminder notes for special things I needed to know (like when benchmarking assessments were due or when I needed to send in the next book orders). It did tend to get to be a bit messy, so I changed up that plan a little.
Instead, I take just a clipboard now. This one is a fancy clipboard actually that someone made for me a long time ago. Obviously it doesn’t even have the right initials on it anymore, but it’s really cool. It’s like a box and then they painted on the front of it.
I like this one in particular because I can open it and I’ve got a place to put a pen and I can put documents in here that go with my calendar.
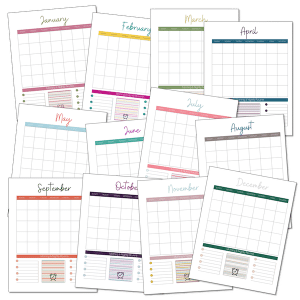
Then, I go to Microsoft Word templates or Office templates and I print off an entire August through June school year calendar. Or find a cute one online. You can choose the template and print them out – one month on each page. OR keep reading as I made you a blank PDF calendar you can download and write on right now!
I usually paperclip them and put them in a sheet protector.
I write down the things that I already know are on my school calendar first.
This is going to be like my master calendar that I would just be lost completely without.
As things come up throughout the school year, you know you use your master calendar to do all your planning. So as you’re sitting down to do your lesson planning for the week, grab that master calendar and plug in the things that are already listed you might not have remembered.
If new things pop up throughout the week, jot them down on a post it quickly and slide the post it into the sheet protector. No organization needed. You might have a pile of post-its stuck in there by the end of the day.
Then, at least once a week, I take off the sticky notes and I put it on the calendar of whatever month that the note goes into. Easy peasy and toss that note into recycling.
The last thing that I have on my desk as well is so important to me. I use a legal notepad for an ongoing to do list.
I put the title Monday on a page, Tuesday on a page, Wednesday, Thursday, Friday, and then after that I put “To be done later”. As things come up throughout the week, I can jot those notes into my plans if I want to or I can put here instead. This is more like my daily to do list so that way I know what needs to get done.
If I don’t get everything done at the end of the day I had on my list, I go to the next page and add it to the next day so it’s constantly a running record.
If it’s something that I know I’m just not going to get to that this week, I add it to that “to be done later” list. It’s a constantly rotating list so I always know what’s coming up next.
I think the important thing is whenever you get papers in your mailbox that need attention in the future (say a meeting note or something about an upcoming assembly), add those things to your calendar, add them to your lesson plans, and then get them filed.
I hope that’s helped you a little bit. My readers who have requested this video for keeping the teacher’s desks clean, just attack it as soon as you get it and keep it clean. Don’t leave until it’s done. That’s pretty much how I do it.”
I also mention the “File Organization for Teachers” blog post I did a while back – make sure to head that way when you are done here.
Need an undated blank calendar download? I’ve got you covered! Download it below.
Enjoy!
~Charity