Calming Classwork Paper Chaos
This video gives several suggestions for classroom teachers for how to organize collecting, grading, and returning student papers in an orderly manner. Tips for simplifying the workload so that it does not become unbearable.

Transcript of Video:
“Hi everyone. It’s Charity Preston from the Organized Classroom Blog.
Today our topic is calming classwork, paper chaos. That’s whenever you have classwork that’s just flying all over the place. You don’t know whether you’re coming or going.
You’ve got papers that have come in that need to be graded.
He’s got papers at home that need to be graded.
You get some that are graded, you have to get them back to the students all over the place.
So I have a few ideas for you today to help you out and hopefully get those papers under control and get your calmness back in your classroom.
So the first idea I have are for in and out baskets. And I’ve used this before in my classroom.
I’ve just gone to the dollar store and bought just a regular flat bottom basket. That’s larger than a typical size sheet of paper so that you can fit them in without them being bent or curling or any of that other good stuff.
I label one IN, I label one OUT.
The students know when they have worked, it needs to go and turn be turned in. It goes in the end bucket and then when I grade it, it goes into out bucket and they can get it returned as well.
Another idea that’s similar to that is you can go to the store and just get just a regular old plastic container.
This one actually has a lid that comes with it, which is going to be handy. I’m going to show you why in a second.
I’ve labeled one side and in one side out, same kind of idea.
You might want to check out:
Need some new ideas for simple routines in your classroom? This 106 page digital book has you covered!
Includes 15 articles from Organized Classroom, including topics such as:
• Organizing Absent Work
• Helping Student Get Organized
• Remembering Names on Papers
• Organizing All the Paperwork
• Bathroom Break Tips
…and even more!
Now available in our Shop! And the second copy to share with a friend is half price!
During the week you’ll have the end bucket or the end sign facing out. Students will turn all their papers in throughout the week. Then when you’re ready to grade, you put your lid on there, lock it in place, take it home with you, graded it, comes back the next day, and then you put it to out.
So then you’ll have your student helpers put away the papers or you will return them.
Or students will just come find their own papers as well.
The second idea is just in using a three ring binder.
This three ring binder needs to have some sheet protectors in it and then also needs to have tabs. However many tabs you need is however many classes you have, how many subjects you teach, how many sections that of course you teach, whatever.
So you’re gonna have a bunch of different classroom tabs and label your tabs for whatever subjects or classes that you have.
Then the idea is in the front packet, you’re to want to put things like post it notes, a grading pen, put an easy slide greater in here. Put your grade book in here. It’s already at your fingertips.
You don’t need to go and find it.
Then once you get a stack of papers that need to be graded, paper clip them and put them behind the tab in a sheet protector of the one that you need to be graded.
So once you get it graded, then you can bring it right back to school, slide it back in there and whenever you’re finished. So that’s kinda handy. It keeps it all in one place as well.
The third idea is very similar to that. The only difference is now we’re going to be using an accordion file.
Now there are several types of these files that you can get.
You can just get a regular old accordion file at the store. I’ve also seen file boxes that have the handles on them. Or today I also saw a scrapbooking file that was, it’s taller than this is.
It’s a little bit taller and it has a handle.
So once again, those kinds of things are going to be a little bit more bulky if you don’t mind carrying something separately. If you’d rather have the handle, that’s always an option as well.
So in this, you’re going to do the same thing. You’re going to have your colored tabs by subject in the front pockets. You can have your PostIt notes. Posted notes are fantastic because you can write down if you’re missing work, if you have something specific that you want to work on with a group of students and who those students are. If you think of it while you’re grading, because you tend to forget those things as you’re going along.
So you will grade it. Make sure you put them in the right pockets and then bring it back to school when you’re finished and get them passed out.
Another great tip whenever you are cut before you collect the work is have students assigned students a number.
Probably alphabetically, however they’re listed in your grade book is the number that you want to give them.
For smaller students, younger children, you might want to put the numbers on their name plate that’s on their desk until they actually memorize it. It’ll probably only take them a month before they memorize it, but next to their name, when they do their work, have them write their names to the on the right corner, top right corner, have them write their number.
Then once you collect work, either have a student quickly or you can, if you have a few extra seconds, go through and organize and arrange your stack of papers.
Once you finished grading, you can just go down through your grade book and enter them in because they’re already an order.
Grabbed your post it notes. And if you don’t, if you have the missing number, you can write down missing assignment. You already know you’re missing it for that student. They were absent, they didn’t turn it in. Whatever. That’s kind of handy too.
And also allows you is in returning the work.
If your mailboxes are listed alphabetically as well or they’re by the number. If you have some students before school during recess or if, if you’re the one who returns the papers, you can throw them in the mailbox that they’re already in order.
Students don’t have to read other students’ names.
They can just return them very quickly and get them back.
Last idea is very similar. You’re going to use this same, you’re going use an additional according file like this, but this time on the tabs instead of subjects, you’re going to put the numbers of the students.
So however many students that you have, you’re going to want to make sure you have enough tabs for them. You may need to accordion files for this. You’re going to have a lot of students in your class.
Would you like to know step-by-step routines that put teachers back in control in just 4 weeks?
Download the FREE Classroom Systems Starter Kit now!
So in here, after you finish grading number one’s paper, you’re going to go in here, find the number one tab and throw it in that packet after you finished grading. So you might want to label on the front of your files work to be graded work that is graded.
So you’re going to collect all of the papers for a week, two weeks, however long you like before you like to return the papers and you’re going to keep putting them in the file once they’re graded. The reason for that is now you’re not going to have to return papers every single day after you finished grading. They’re all in one place.
When you are ready to return them, you can put them together in a stack, staple them, get them all stapled.
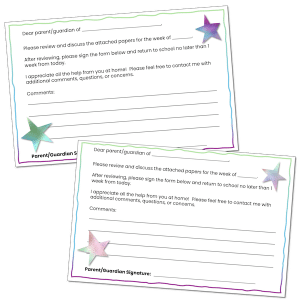
Then on the front of there, if you would like to put a newsletter sheet, if you want to a classroom newsletter or I also have a parent guardian signature select as well, which says, please review your work. Do you have any comments or questions for me? Please sign this.
So I know that your child brought it home to you. If I don’t see those slips returned, then I can make some calls home to see what’s going on.
I hope you enjoyed some of our ideas for collecting work, rating work and bringing work back.
I hope it’s helpful to you.
You guys all have wonderful ideas. I know that you could share and add to our learning community as well.
And if you are enjoying the videos, please pass them on. A great way to do that is by right underneath the video clicking the share button. And share it with other people that you think might benefit from this as well.
The more people we have on our site, the more interactive we can be and learn from one another. Bye.”
Freebie Alert!
This post also includes a free “Graded Papers Parent Signature Sheet.” Grab it below!
~Charity