Super Easy Bulletin Boards
Here is the latest in my video series for how to show off your great student work without having the hassle of having to change it constantly.
I demonstrate a fun way to get students involved, right from the first meeting at Parent Open House Night so that you do not even need to use your instructional time to get it up.
Parents and classroom visitors will be amazed at how often new work is shown, without realizing that the student changes the work – not you! Definitely “Less Stress, More Effectiveness”!
Only needing black frame mats and sticky foam letters, materials and prep time are also at a minimum.
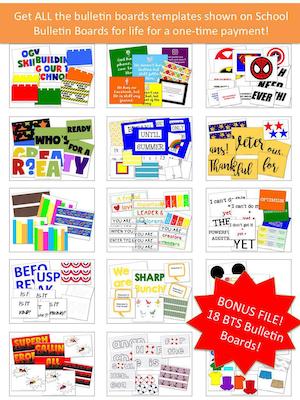
Need a quick idea (or 18!) for a Back to School board? I’ve got you covered!
18 files in one spot!
Each includes directions, premade printable title letters, borders, and student name accents. You simply need a student roster and a printer. Easy and lots of choices!
Includes: Legos, shamrocks, writing, cookies, Tootsie Rolls, dogs, space, sunglasses, fish, gummy bears, buckets, rulers, calculators, owls, wild animals, bees, dinosaurs, and candy themes!
Prefer to read the transcript? We’ve got you covered!
Transcript:
“Hi everyone! Charity Preston here from the Organized Classroom Blog today.
We’re going to be talking about a really cool, easy way to do a bulletin board or put out some student work on wall
The best part will be it’s something that’s not going to have to be rotated all year long and the students are in charge so it makes it super easy for you!
This is something I’ve done in a lot of my classrooms and the students, parents, and administrators like it, which means I like it.
The first thing you’ll need are picture frame mats. Now this one is a 9×12.
I want it to be bigger than a standard size sheet of paper because I’m going to be hanging a standard sized sheet of paper in the middle of it. And I don’t want it to overlap it.
Amazon has some and they’re a pretty good deal. So I always buy a stacks of them.
I like to do this project on open house night. It’s an easy thing for students to be able to do and their parents can be with them to kind of hurry them along that way you don’t have to take up class time. And you can hang them up then right away.
On open house night when the students come in, they find their desks, and they will find one of these frames.
It’s just a really heavy tag board.
Then in the middle of the grouping of student desks, I also have a basket which has lots of foamy stickers that have lots of little decorations on them.
And then I also have a small trashcan somewhere nearby because they are going to make a mess.
Then one last thing that you’re also going to need is letters that are foam stickers too. You can get the, in millions of different fonts and letterings and colors. I really liked the primary colors because I think it looks super sharp on the black frame.
Students will first put their name on their frame. They’re going to use the sticky foam letters to put them on there.
They can come down the sides or across the top or bottom. They could do it backwards. It’s up to them. That’s the best part of us. It’s their frame. There’s no right way. There’s no wrong way. As long as their name gets on the frame some place, they are good.
Then they will decorate their frame with the stickers from in the basket as well.
Whatever they want to throw on there.
I have used sports, flowers, party stickers with balloons and party hats, or there’s a million different options out there.
Craft stores are a great place to find these.
So this is what a finished one would look like. This one of course is Natalie’s. And as you can see, you put it on a bulletin board or on a wall.
It looks pretty nice and the colors really pop out on the black background. Of course you can even pick mats that are different colors or white if you prefer to match a classroom theme.
They can decorate this as much or as little as they want to and their parents will be there.
You can put it on a plain cork board or if you have a wall in your room, they also look super fantastic.
I have stapled it directly to my classroom wall or I have also used Stikky Clips. I get these at my local teacher supply store or on Amazon.
They are a little clips that have wax on the back of them. I work in a room that is concrete block. So no amount of tape will stick those up there. They’ll stay up there all year long if I use Stikky Clips.
Then throughout the year, students get to pick what gets displayed in their frame.
School Bulletin Board Full Site Access
Create your bulletin boards in a snap with premade templates!
Click HERE to see more!
It can be a certain assignment, a drawing that they made for you, whatever they want. That’s the key to this is you don’t ever have to change the student work all at one time.
I would probably start with some type of paper at the beginning of the year for the first week of school or at an open house so they have a starting point, but after that they get to choose how often it gets changed.
To attach the paper, just grab some sticky tack and put the paper right in the middle of it.
I’ve also used this little dots of wax as well. These work just as well, once again, if you have concrete block walls.
Now, you will get some students that will never change their work, but that’s their choice.
You will get some students that are going to want to change it out every single day. That’s okay as well.
I would encourage it.
If you’re passing back something and you see they’ve done really well, it’s something that’s very creative, or it is something that you think their parent might want to see before parent conference night, have the student give it to you and you can swap it out very quickly.
The old paper that was on the wall gets handed back to them. The new paper goes up.
You don’t even have to make sure there’s a name on it because there’s already a name on their frame.
So that is my quick and easy idea for great bulletin boards.
These will last all year when a parent or an administrator comes in to see what you have displayed on your wall.
There is always going to be something fresh up in those frames and the students are going to be proud of what is up there because they have chosen to put whatever they wanted up there.
So that’s the idea for today. I hope you enjoyed it.
Make sure if you have other great ideas, feel free to join us at our Facebook fan page at Organized Classroom.
Of course, you can still find me on my YouTube channel.
If you double click on this video, right at the very top, there’s a subscribe button. If you click on that button, you will be subscribed to my channel and be able to see all of my videos for different classroom organization ideas and different things that I’ve done as well.
And of course you can always come and find us at our website, OrganizedClassroom.com.
I look forward to hearing, seeing, and interacting with you on our Facebook fan page.
I hope you have a great night. Bye.”
Enjoy!
~Charity