Flipping for Assessment
Keeping with the video theme this week, today’s idea is an oldie but a goodie that I imagine a lot of veteran teachers still use to this day.
Assessment is part of being a good teacher and while many think the only way to assess is through a paper and pencil test, I am here to gently remind those few that there are lots of ways to assess student learning.
And running records are great not only for seeing growth, but also for having a paper trail to monitor individual student strengths and needs.
You might want to check out:
Need some new ideas for your assessment and parent conference routine? This 82 page digital book has you covered!
Includes 14 articles from Organized Classroom, including topics such as:
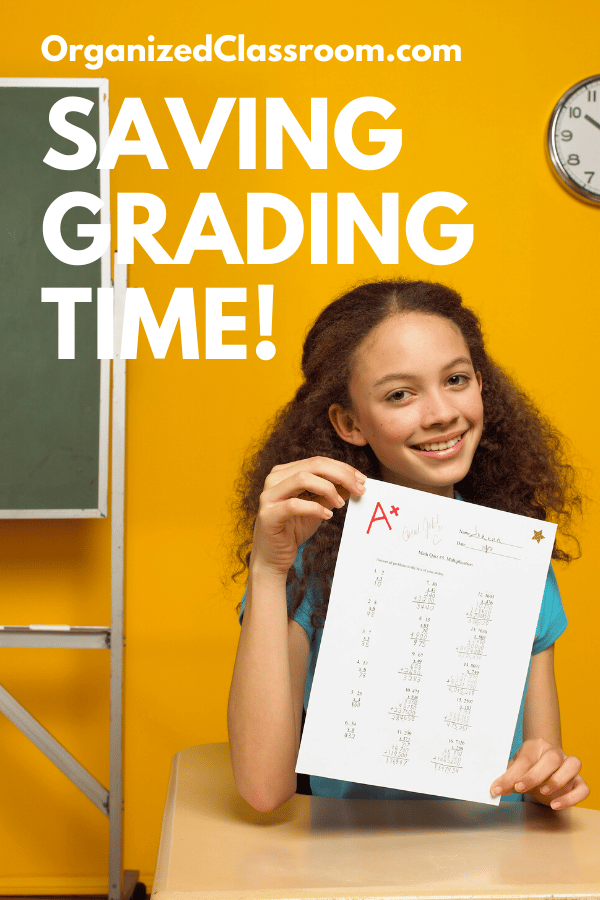
- Saving Grading Time
- How to Set Up Student Data Folders
- Self-Assessment for Students
- Quick Informal Assessment Hacks
…and even more!
Now available in our Shop! And the second copy to share with a friend is half price!
The video below shows you a quick and easy way to set up running records that can be as formal or as informal as you choose! Use different colored cards for different reasons:
- Reading workshop
- Writing workshop
- Math fluency
- Vocabulary Mastery
- Reading Fluency
- Behavior, and more!
Watch the video below to see the tutorial for making your own flippable running record assessment:
Prefer to read the transcript? I’ve got you covered!
“Hi guys, Charity Preston here from the Organized Classroom Blog.
Great to see you back!
Today, we’re going to do a fun little tip for assessment.
If you like to do running records and keep track of some things, these are fantastic for parent conferences. If you need to make a phone call it’s documentation right at your fingertips.
Now, if you’re a veteran teacher, you probably already know about this. But if you’re a new teacher, you may or may not have seen this before. And I want to make sure that all teachers have seen this idea.
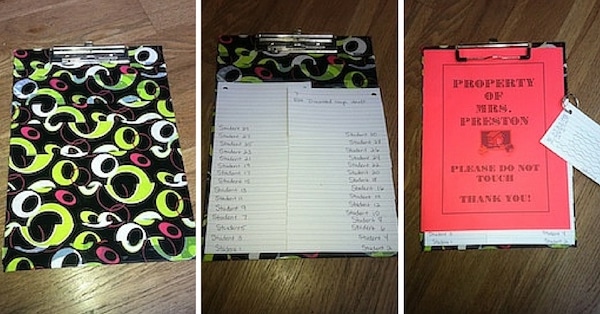
This is my handy little clipboard that you could then hang on your wall somewhere. Obviously this says, do not touch. That is because it is going to contain some assessment information.
You don’t want students getting their googly eyes all over it. This is for your eyes only.
Another quick little tip: I was kind of disgruntled because I only had an ugly old clipboard that I didn’t really want to use for this video so I was going to go to the store and buy new one.
My daughter actually suggested to use packing tape to cover it up. So I did. Check this out. And it’s like a new clipboard. I’m so excited. So anyway, that’s a fun little way to spruce up a clipboard if you didn’t know that.
Alright – back to the assessment idea.
This is what it looks like under the Do Not Disturb sign.
You’re going to have notecards taped onto your clipboard.
Now I have two columns because I have 30 students in my class. So if you have many less than that, you could probably just do one column down the middle, but I wanted to go back and forth with them so that I would have enough on one side of the clipboard for all of my students.
Now, this is how it works. Basically you take regular note cards lined or unlined, that already have holes punched in them.
I didn’t have note cards with holes punched already, so I just grabbed a stack of them, threw them into my hole puncher and punched the tops of them on either side.
Begin by grabbing one note card and add a student name at the bottom of the card someplace.
Make sure each one of your students has a card.
Once you have a card created for each child, you are going to begin placing the cards on your clipboard.
You will be starting from the bottom, so if you’re doing it alphabetically (up to you the order), go ahead and start with your last student in the alphabet.
You’re going to add that card first right on the bottom edge and use a little piece of clear tape along the top edge of the card to secure it in place.
And then you’re going to repeat the process with the next student by adding the next notecard over top of the first, while still being able to see both students’ names. Add your little piece of clear tape to the second card.
Keep repeating that process until you add all student cards to your clipboard. Now you have an accordion that can flip and you can write on any single card.
So when I was talking to student #30 during their writing conference time for example, I wrote the date and that we discussed the rough draft of their current assignment.
You can add more details if you want to, such as something to focus on before the next conference.
Each student has their own individual set of notes and individualized instructional goals that you always have access to right at your fingertips simply by grabbing the clipboard for that topic. It even works for behavior management!
The great part of this is whenever your card is filled up on the front, you can even write on the back too.
When one particular card is full, just peel the card off, fold the tape over (don’t pull off as it may rip some of the documentation off the card), and you can file any way you like.
One option is to grab some binder rings. This would be an example. I’ve got two holes. So I have two O-rings.
Each student would have their own fancy little assessment card file here that you could then place into their student file, which would be fantastic.
You might also be interested in:
This program is 62 pages, and includes 26 templates that are completely editable so you can personalize your conferences to your liking! Also includes forms for having ongoing Data Folders – recommended for grades 2-12! Parent Conference Night has never been so easy! Discover for yourself!
You can pull it out for a parent conferences, report cards, midterms, or whatever you want to do.
Another fun tip would be to use several clipboards with different colored notecards for different subjects. That way on the individual student document on their ring in their file would be easy to locate specific information for individual subjects or topics in which you had private conferencing.
The times when you would normally conference with a student one-on-one is when you’re going to want a clipboard, because then you can walk around with your assessment tool or have it handy for private conferences at your desk.
You’ll have this in front of you, you can sit and chat with the student, and write down your notes. And you always have record of that.
So then you can go back to the parents later and say, “On 8-22, we did talk about this. And yet he’s still having problems with this. And look, we talked about it five more times after that and we still don’t see anything different. So let’s do some kind of intervention.”
This is super handy for you to remember those individual student needs, especially when you’ve got anywhere from 15 to 30 students or more in a classroom.
Then whenever you are finished with it for the day, you can pop your little “Do Not Disturb” sheet on there and go hang your clipboard up someplace where students cannot easily gain access to it – or lock it up in a filing cabinet until it needs used again.
That is out fun little tip for today. Really easy assessment documentation flip cards.
I know that many veteran teachers have used this as it’s not a new concept, but it’s one that is important (plus it’s easy to implement and it’s super cheap). So I thought I would pass it on.
I hope you’ve enjoyed today’s tip!
If you have any tips to share with our readers, feel free to contact me at Organized Classroom. If you’re loving the videos, make sure that you click on the subscribe button on my YouTube channel.
Thanks so much and I’ll chat with you again soon. Bye.”
How would you utilize this simple setup in your classroom? Please leave me a comment below to share – I love even more great ideas.
Enjoy!
~Charity